When it comes to achieving a flawless, long-lasting paint job, proper surface preparation is key. Skipping or rushing this critical step can lead to uneven coverage, peeling, and a less-than-professional finish.
In this pro’s guide, we’ll delve into why surface preparation before painting is essential and how it directly impacts the durability and appearance of your project.
From cleaning and sanding to patching holes and priming, these preparation steps play a vital role in ensuring the paint adheres properly and delivers a smooth, vibrant finish.
Understanding the Impact of Surface Preparation on Paint Durability

When it comes to painting, surface preparation is the key to achieving a durable and long-lasting finish. Properly preparing the surface before applying paint ensures that the paint adheres well and provides a smooth and even appearance. Without adequate preparation, paint can easily crack, peel, or blister, leading to unsightly results and the need for frequent touch-ups or repainting.
One of the main reasons why surface preparation is crucial is because it helps remove any existing contaminants or imperfections on the surface.
Dust, dirt, grease, and grime can prevent paint from properly adhering to the surface, resulting in poor adhesion and premature failure. By thoroughly cleaning and preparing the surface, you create an ideal foundation for the paint to bond with.
In addition to removing contaminants, proper surface preparation also involves repairing any cracks or damage present on the surface. Cracks can allow moisture to seep into the substrate, causing further damage over time.
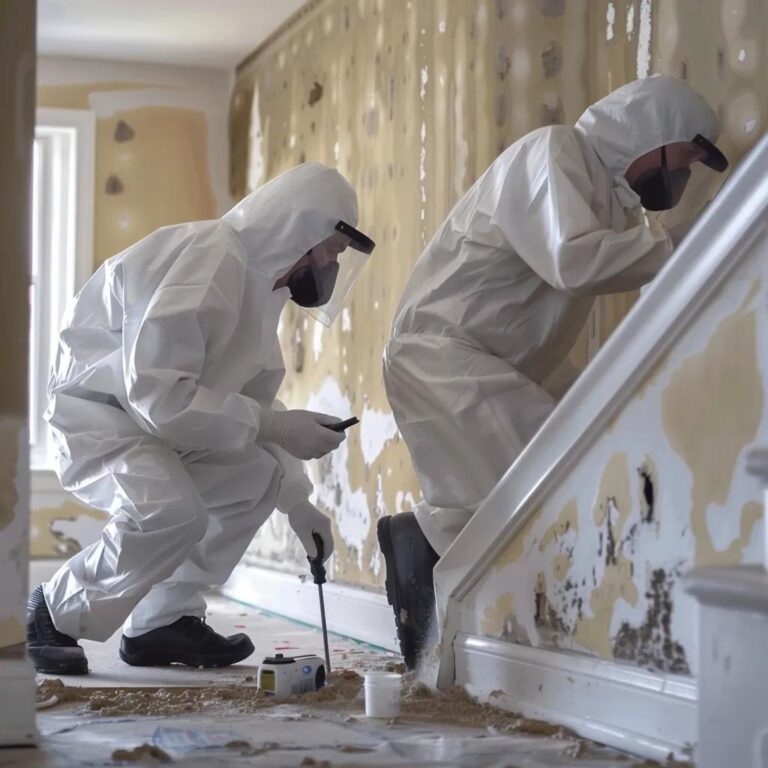
Identifying Common Surface Issues: Cracks, Peeling, and Mold

One of the most important steps in surface preparation before painting is identifying and addressing common issues like cracks, peeling, and mold. If not dealt with properly, these problems can greatly affect the quality and lifespan of your paint job.
Cracks in the surface can stem from structural settling, temperature changes, or poor previous paint jobs. It’s essential to thoroughly inspect for cracks before painting, and any found should be filled and smoothed out with the right fillers to create an even surface.
Peeling paint is another frequent issue, often caused by moisture, poor adhesion, or using incompatible paint types. Before you start painting, make sure to scrape off any loose or peeling paint, sand the surface smooth, and apply a primer that will help the new paint adhere properly.
Mold growth is not only unsightly but also a health concern, often found in damp areas like bathrooms and basements. Before painting over mold, it’s crucial to address the underlying moisture problem, clean and disinfect the area thoroughly, and use mold-resistant primers and paints to prevent it from returning.
Importance of Cleaning and Prepping Surfaces for Paint Adhesion

Cleaning the surface is an essential step in surface preparation before painting. It removes dirt, dust, grease, oils, and other contaminants that can hinder paint adhesion. There are various methods for cleaning surfaces depending on the type of material being painted.
For most surfaces, a simple solution of mild detergent and water can be used for cleaning. Scrubbing the surface with a soft brush or sponge helps remove stubborn dirt or stains. Rinse the surface thoroughly with clean water after cleaning to ensure all residue is removed.
In some cases, more intensive cleaning methods may be required. For example, pressure washing is often used for exterior surfaces that have accumulated years of grime or mold growth. Chemical cleaners may also be necessary for removing tough stains or grease buildup.
Once the surface is clean, it’s important to properly prepare it for paint adhesion. This may involve sanding rough areas or using a primer to create a smooth and uniform surface. The specific steps required will depend on the condition of the surface and the type of paint being applied.
Tools of the Trade: Essential Equipment for Proper Surface Preparation

To achieve professional results in your painting projects, having the right tools is essential. Here are some of the essential equipment and tools you’ll need for proper surface preparation:
- Scrapers and putty knives: These tools are used to remove loose or flaking paint, as well as to scrape off any surface imperfections.
- Sandpaper or sanding blocks: Sanding helps smooth rough surfaces and creates a better bonding surface for the paint. Different grits of sandpaper may be needed depending on the level of smoothing required.
- Wire brushes: Wire brushes are useful for removing rust, scale, or other stubborn debris from metal surfaces.
- Cleaning solutions: Depending on the type of surface and contaminants present, you may need various cleaning solutions such as mild detergent, degreasers, or specialized cleaners.
- Pressure washer: For exterior surfaces or large-scale projects, a pressure washer can be used to remove dirt, grime, and mold more efficiently.
- Primers: Primers are essential for promoting adhesion between the surface and the paint. They also help seal porous surfaces and provide a uniform base for the topcoat.
Sanding Techniques for Smoother Surfaces: Grits, Methods, and Tips

Sanding is a crucial step in preparing surfaces for painting, as it helps create a smooth, even surface that allows the paint to adhere properly. This process eliminates imperfections like rough patches, drips, and brush marks from previous coats, ensuring a more professional-looking finish.
Choosing the right sandpaper grit is key to achieving the desired results. For heavy sanding or removing large imperfections, coarse grits like 80 or 100 are ideal. These grits quickly smooth down uneven surfaces but should be followed by finer grits to refine the surface. Medium grits, such as 150 or 180, work well for smoothing out previously painted surfaces or minor flaws. For the final smoothing before applying paint, finer grits like 220 or 320 are recommended to create a flawless finish without leaving scratch marks.
Proper technique is also important for effective sanding. Apply light, consistent pressure to avoid gouging the surface, and always sand in the direction of the grain on wood surfaces or in a circular motion on other materials. Using a sanding block or sanding tool helps maintain even pressure and ensures uniform results.
Once sanding is complete, removing dust and debris is essential. Wipe down the surface with a tack cloth or vacuum it to eliminate dust that can interfere with paint adhesion, ensuring a smooth, durable finish. This attention to detail is critical for achieving a flawless end result in your painting project.
Filling and Repairing Surface Imperfections Before Painting

Before painting, it’s essential to address surface imperfections such as holes, dents, or cracks. If left unattended, these flaws can lead to an uneven finish, affecting both the appearance and durability of your paint job.
For small holes or minor cracks, a patching compound or spackling paste is usually sufficient. Using a putty knife, apply the compound smoothly over the imperfections, pressing it into the area to ensure full coverage. Once the compound has dried, sanding the area with fine-grit sandpaper will create a smooth, even surface that blends seamlessly with the surrounding material.
For larger holes or significant damage, a more robust solution may be needed. Repair patches, available in various sizes, can be applied to reinforce the area before applying a filler. In extreme cases, replacing a section of drywall or wood might be necessary. Follow the manufacturer’s guidelines carefully to ensure proper adhesion and a durable repair.
Once all imperfections are filled and repaired, it’s important to sand the patched areas again. This step ensures a uniform surface, eliminating the risk of visible patches once the paint is applied. Proper preparation not only enhances the final aesthetic but also contributes to the longevity of the paint, ensuring that the surface remains smooth and blemish-free over time.
Dealing with Moisture and Mildew: Prevention and Solutions

Moisture and mildew can significantly affect the quality and durability of your paint job if not properly addressed during surface preparation. Moisture can lead to bubbling, peeling, or blistering of the paint, while mildew growth can cause stains and pose potential health risks due to mold exposure.
To prevent moisture-related issues, it’s critical to ensure that surfaces are completely dry before painting. Painting over a damp surface can trap moisture beneath the paint layer, leading to problems down the line. If you notice any water damage or persistent moisture, it’s important to address the underlying cause—whether it’s a leak, poor ventilation, or high humidity—before beginning the painting process. This might involve repairing plumbing, improving ventilation, or using dehumidifiers to manage excess moisture.
When dealing with mildew, thorough cleaning is essential. Use a mildewcide or bleach solution to clean affected areas, ensuring that all mold or mildew spores are eliminated before painting. Failing to do so can result in the spores growing back beneath the paint, causing discoloration or further damage.
In high-humidity areas like bathrooms or basements, consider using paints with built-in mildew resistance. These products are specially formulated to withstand moisture and inhibit mildew growth, providing long-lasting protection and reducing the need for frequent maintenance.
Primer: The Unsung Hero of Proper Surface Preparation

Primer is often an unsung hero in surface preparation, but it plays a critical role in ensuring the longevity and quality of your paint job. Acting as a bonding agent, primer enhances adhesion between the surface and the paint, helping the topcoat stick better and last longer. Skipping this step can result in poor coverage, premature peeling, or uneven finishes, especially on porous or previously unpainted surfaces.
One of primer’s main benefits is its ability to seal porous materials, such as wood or drywall, preventing them from absorbing too much paint. This not only ensures a more uniform finish but also reduces the amount of paint needed, saving time and money.
Primer also creates a smooth, consistent base, which helps improve color accuracy and ensures that the topcoat is applied evenly. This is especially important when transitioning from dark to light colors or when covering stains and other imperfections.
When selecting a primer, it’s important to consider both the surface and any specific challenges you’re addressing. For example, there are specialized primers designed for wood, metal, or drywall, as well as stain-blocking primers that can cover up water damage, smoke stains, or odors.
Tailored Approaches for Different Surface Materials: Wood, Metal, and Drywall

Different surface materials require specific preparation techniques to ensure a flawless paint finish. Here’s how to approach wood, metal, and drywall surfaces effectively:
- Wood: Begin by scraping away any loose or flaking paint using a scraper or sandpaper. Sand the entire surface to smooth rough spots and create an even base for paint. Be sure to address imperfections like cracks or holes with wood filler, allowing it to dry fully before sanding again for a seamless finish. After sanding, thoroughly clean the surface to remove any dust or debris, which can interfere with paint adhesion. Finally, a wood-specific primer will be applied to enhance paint bonding and protect the wood from moisture.
- Metal: Preparation for metal surfaces begins with removing rust or corrosion using a wire brush, sandpaper, or a rust remover. Clean the surface with a degreaser to eliminate oils or grease that could compromise the paint’s adhesion. Applying a rust-inhibiting metal primer is essential to prevent future corrosion and ensure the paint bonds securely to the surface. Be sure to follow any manufacturer instructions for specific metal types, as different alloys may require specialized treatments.
- Drywall: Start by removing any loose paper or debris and patching any small holes or dents with a joint compound. Apply a drywall primer to seal the surface and improve paint adhesion, especially in new construction or on previously unpainted walls. Lightly sanding after priming ensures a smooth finish, minimizing imperfections that could show through the topcoat.
Conclusion: Achieving a Professional Finish Through Proper Surface Preparation
Proper surface preparation is the key to achieving a flawless, long-lasting paint job. By understanding the impact of surface preparation on paint durability and following the right techniques, you can achieve professional results that stand the test of time.
If you’re ready to transform your space with professional painting services, trust the experts at Restor-It, Inc. to handle every detail of your painting and drywall repair, as well as any home renovation and restoration services you may need. Contact us at (678) 355-6645 or visit our website to fill out the form for a free quote today!