Discover a new standard of excellence with our comprehensive flooring installation and restoration services in Marietta, GA. We specialize in carpet cleaning, water, fire, and mold restoration, breathing new life into your space.
Experiencing home damage, whether due to water, fire, mold, or simple wear and tear, can be overwhelming. The consequences not only affect the aesthetic appeal of your home but can also impact its structural integrity, functionality, and overall value.
But there's no need to worry. Our team at Restor-It, Inc. is here to help. We offer comprehensive home restoration services in Marietta, GA, including professional flooring installation. We're experts in managing all types of home damage and specialize in breathing new life into your space. Let us take the stress off your shoulders and restore your home to its former glory. Trust us; you'll feel like you're stepping into a brand-new home.
You have peace of mind knowing our 24/7 emergency restoration services are always ready to swiftly address any sudden water, mold, or fire damage to your home.
As a client, when you turn to Restor-It, Inc., you're choosing a full-service restoration company that cares about your home as much as you do, guiding you every step of the way as they transform your damaged property into a space of comfort and beauty.
When you choose Restor-It, Inc., you're trusting an IICRC-certified, mold-certified, and fully insured company that prioritizes your peace of mind while we expertly and safely restore your home.
You can rest knowing that we won't consider the job done until you're delighted with every aspect of our restoration services.
"Real expertise and a commitment to quality. They know what they are doing, the work gets done on time and with quality and at a fair price."
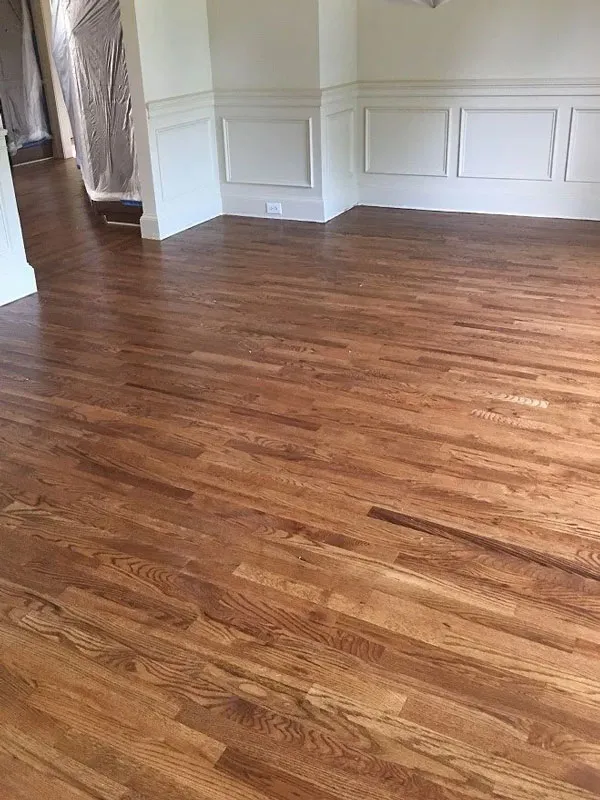
Choosing the right flooring for your living space can be daunting, given the many options available and the technicalities involved in the installation process. It's not just about picking a design that complements your home decor; it's about ensuring longevity, ease of maintenance, and a proper installation that guarantees durability.
At Restor-It, Inc., we address all these concerns and are here for all your flooring needs. As your flooring contractor, we will guide you through the selection process, offering expert advice on the best flooring options for your lifestyle. Additionally, we ensure meticulous and professional installation, assuring long-lasting and aesthetically appealing results.
Our professional installers assist with the following:
The aftermath of water, mold, or fire damage can be overwhelming. From structural damage to potential health hazards, these issues can disrupt your life and leave your property in disarray. Additionally, navigating insurance claims for restoration services can be confusing and stressful.
A delay in addressing these damages can lead to more severe problems. Water damage can lead to mold growth, while fire damage can cause issues for the structural integrity of your home. These issues can cause further harm to your living space and pose health risks to you and your family. On top of that, the complexity of insurance claims can add to your stress, making the restoration process more daunting.
With Restor-It, Inc., you need not worry any longer. Our comprehensive restoration services are designed to handle all water, mold, and fire damage swiftly and effectively. Our certified professionals utilize advanced restoration techniques to ensure your home's safety and restore it to its former glory. Moreover, we also offer assistance with insurance claims. We understand the intricacies of the process and aim to make it as hassle-free as possible for you. Let us take care of your restoration needs so you can focus on what matters most - returning to your normal life. Trust Restor-It, Inc. and you'll feel like you're stepping into a brand-new home again.

We can help with:
Imagine walking into your home and seeing it exactly as you've always dreamed. With Restor-It, Inc.'s home renovation services, this can become your reality. Our expert team specializes in remodeling kitchens and bathrooms, the two areas that, when upgraded, can significantly boost the value of your space and improve your overall living experience.
Our Restor-It, Inc. team comprises experienced professionals who will work with you to understand your needs, vision, and budget. We'll transform your kitchen or bathroom into a space that not only looks stunning but also functions perfectly for your lifestyle. Whether you're looking for a modern, classic, or unique custom design, we can create a space that you will love for years to come.
Our hassle-free renovation process ensures that your project will be completed in the allocated timeframe, within your chosen budget, and with minimal disruption. Plus, a remodeled kitchen or bathroom doesn't just make your home more enjoyable to live in; it also increases its market value.

Our renovation services include the following:
Over time, carpets tend to accumulate dust, allergens, and stains, which can not only affect your home's cleanliness and hygienic environment but also reduce the visual appeal of your spaces.
Restor-It, Inc. offers professional carpet cleaning services in Marietta, GA. Our team of carpet experts uses environmentally friendly cleaning solutions to deep clean your carpets thoroughly, effectively removing dust, allergens, and tough stains. We rejuvenate your carpets, enhancing their appearance and extending their lifespan. Trust us to transform your carpets, making them look as good as new, and create a cleaner, healthier environment in your home.

Over time, your carpet can show signs of wear and tear, such as fraying, staining, or matting, and similarly, your flooring may experience damage like scratches, dents, or warping. Both instances can negatively impact the visual appeal of your space and hinder the functionality of your floors.
If these issues are left, it can lead to further deterioration, making the problems more challenging and expensive to fix. The damage may even become so severe that total replacement is required, which can be a costly and disruptive process.
Don't let a worn-out carpet or damaged floor ruin the aesthetic of your home. Our team of restoration professionals is skilled in handling a wide range of carpet and flooring issues, ensuring that your floors look their best and function flawlessly. We employ advanced techniques and the highest quality materials to repair your carpets and floors, restoring their original appearance and extending their life. Trust us to revitalize your floors and transform your living space.

"Bob and the team at Restor-it do a fantastic job! Great communication and attention to detail. Would recommend them to anyone."


Whether it's an emergency restoration, a stunning floor installation, a meticulously cleaned carpet, or a dream home renovation, we are committed to making your home a place of comfort, beauty, and pride. Choose Restor-It and step into a home that truly feels like your own.